How to Change a Cricut Blade
The Cricut machine is so much joy to use, it will eventually get dull from overuse. Once dull, you’ll notice that it doesn’t provide you the clean-cut that you’ve come to expect from it. It’s a sure sign that now the blade has worn down to the point where a new one is required. Of course, you’ll want to look for the highest-quality knife blades available and be familiar with the proper installation procedures for your Cricut machine.
So, all you need to know about how to change the Cricut blades to cover them in this article. The blades in the casing can swap out for a new one, or a new blade can install in your machine. Both Cricut Explore Air 2 and Maker cover in this section. That being the case, if you want the greatest potential results from your machine, you’ll need to keep your blades in top condition.

Read: Best Sublimation Inks of 2022 – Compatible with Epson and SawGrass
When Should you Change your Blade?
It would help if you changed your blade when:
- Cut lines can make weeding your projects more difficult
- When you find yourself putting more emphasis on various projects than you normally would
- Your Cricut isn’t entirely cutting through the material, even if you’re using the correct settings
- If the machine is unable to cut complex patterns

When Should you Replace your Blade?
It depends on the following factors:
- How much are you dependent on your machine
- Your machine’s ability to cut a variety of materials
Recommended: How to Clean a Cricut Mat and Make it Sticky Again
Steps to Change Cricut Blades
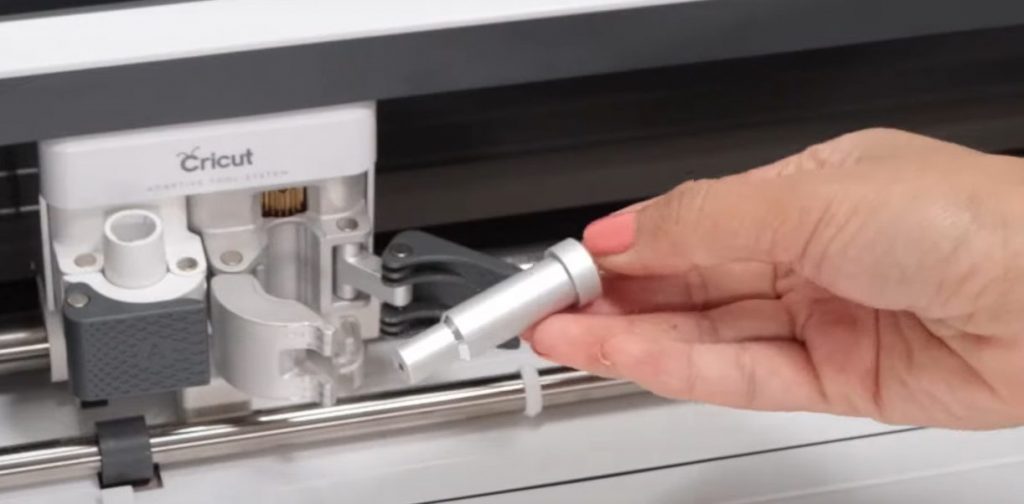
1. Remove Blade Cover
To begin, you must first remove the blade cover from your Cricut machine. The Explore or Maker will require you to open Clamp B on a double tool holder if you’re using one of these tools. Older Cricut machines require you to remove the Cricut blade cover by unscrewing the black arm. Most of the people who find it can manually remove this screw.

You will need to gain access to the machine’s cutting assembly irrespective of which situation you found yourself in. It is always found on the outside of the plotter, next to the power button. When you initially open the door of your Cricut machine, that’ll be the first thing you notice when you open it.
The blade housing can easily remove after the clamp that keeps it in place has been released.
2. Eject the Blade
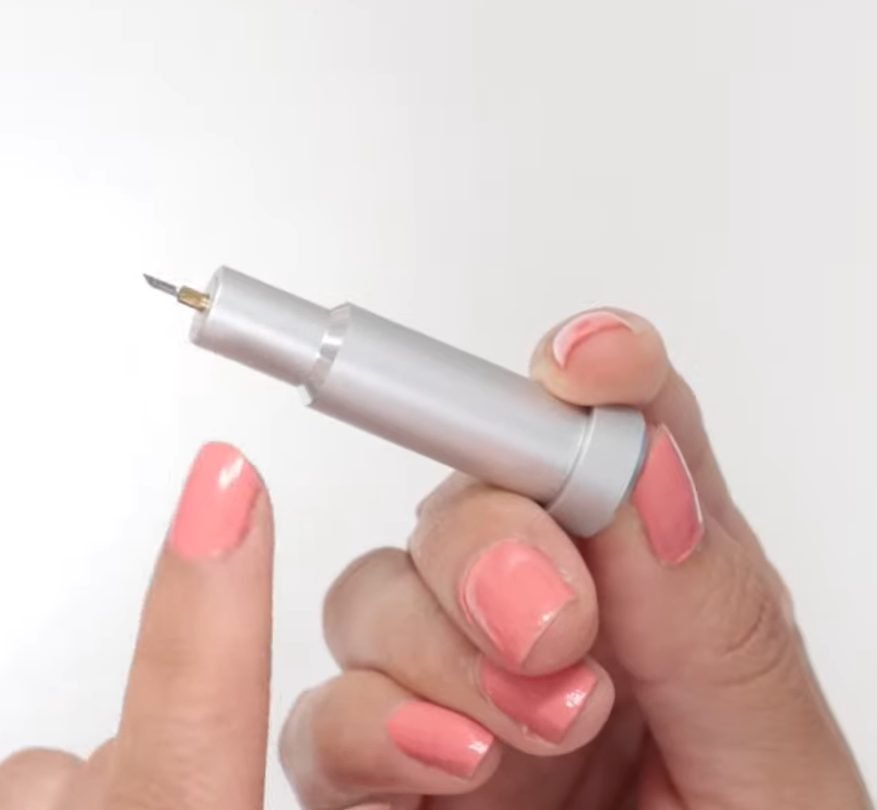
The plungers in the blade housings of the Premium Fine-Point, Deep-Point, Fine point, and Deep-Cut blades are all very small. To release the blade, gently press down on the plunger on the casing. A small gathering basin or cutting mats should place under the blade housing. Blades are little and, as a result, are quite easy to misplace.
- Knife Blade Removal
It’s necessary to cover the blade and the housing sleeve when changing a knife blade. This feature includes the price of a new blade. Place the changing cap on the blade housing’s blade side and secure it. With one hand, firmly grasp the housing. While you’re waiting, turn a changing cap counter-clockwise with your other hand. Flip the cover so that the blade is in a perpendicular position to the table after this step. You want the blade to come out of the handle.
- Remove Rotary Blades
You’ll need a blade changing kit if you’re using a Rotary Blade. After removing the blade nut with the provided screwdriver, remove the changing cap from the blade as well as the housing sleeve. Keep the old blade and washer on the cap, and don’t try to remove them. But even if they’re dull, they’ll still hurt you.
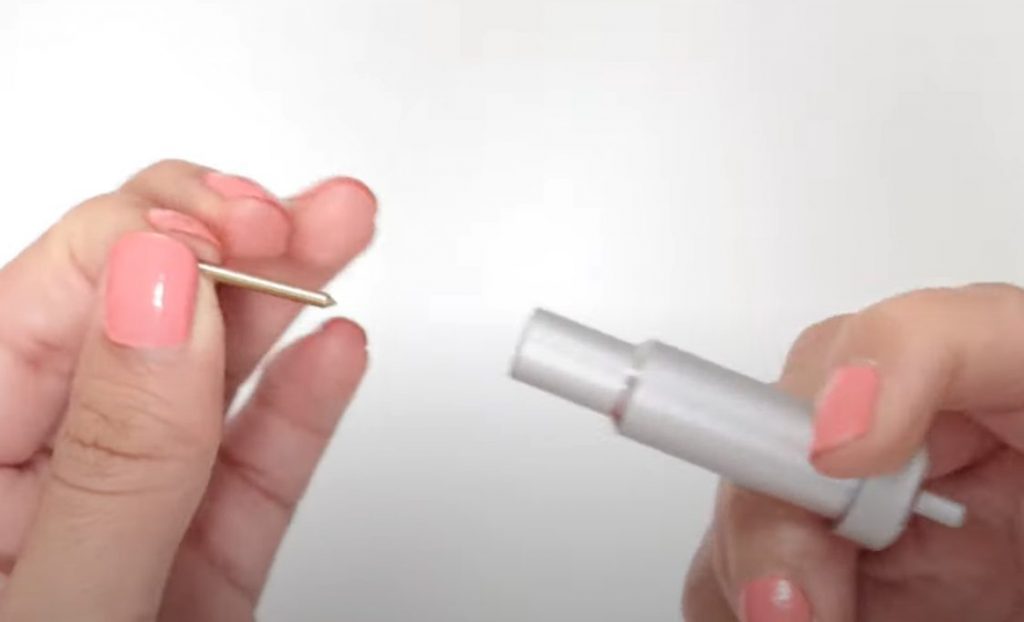
Once a blade has been replaced, Put the old one back into its original plastic container. It serves as a good temporary shield for you. Eventually, you’ll have to discard your old blades. Another approach is to save these used blades in case of an emergency while crafting
Read: Acrylic Prints Vs Canvas Prints – Which is Right for You?
3. Preparing Your New Blade
If it is a rotary Blade or a knife Blade, remove the protective cover from your substitute blade. Changing the caps is included. The blades are protected at all times by the changing caps. It protects the fingers of crafters such as you to switch out blades.
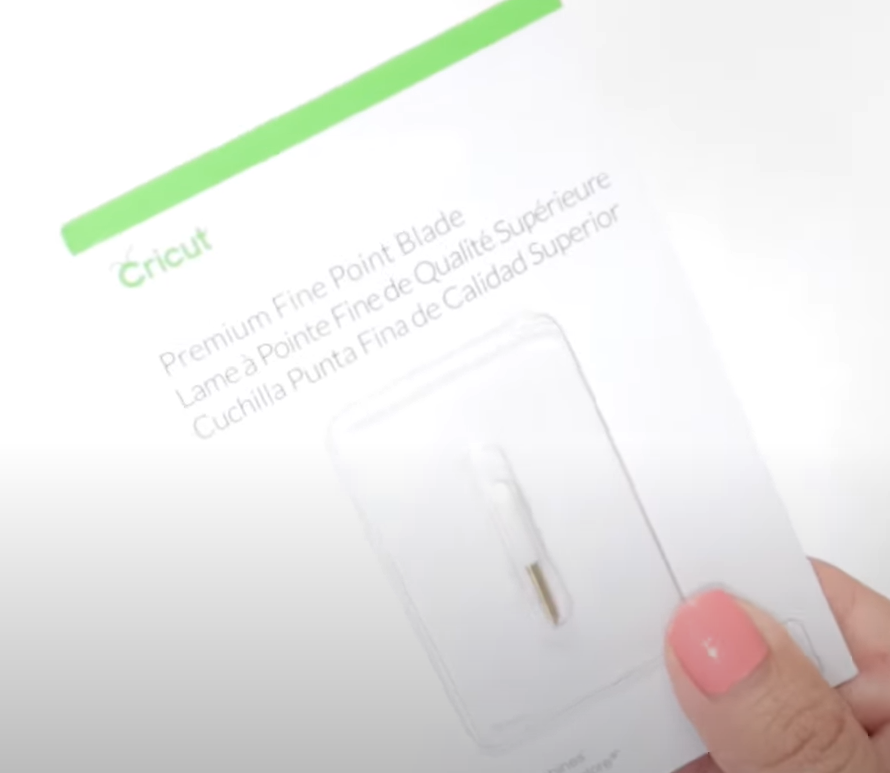
4. Insert the New Blades
- Assembling Fine-Point, Premium, Deep-Point, Deep-Cut, and Fine-Point Blades
Incorporate your newly bought blade into the correct housing. Grip the cutting end of the blade tightly and gently insert it in the slot at the underside of the blade casing when installing a Premium Fine-Point, Fine-Point, Deep-Point, or Deep-Cut blade. The blade should be held in place by the magnet within the casing. Only the blade’s tip should protrude from the close of the housing if the blade has been properly installed.
- Putting Knife-Point Blades
It is necessary to place your new knife-point blade into the base of your casing if you are replacing an existing knife-point blade. Ensure the blade’s indent aligns with a groove in the housing. When you’ve finished reinstalling the housing screw, you’ll want to tighten the changing cap. The changing cap can now be removed and thrown away.
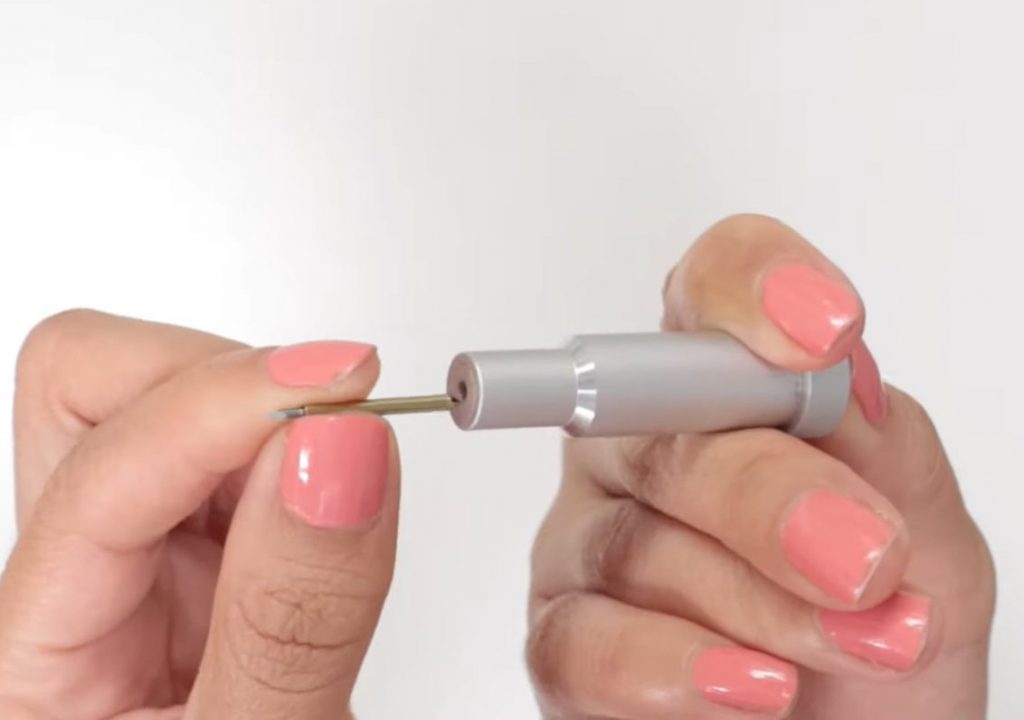
- Rotor Blades Installation
Replace a Rotary blade by sliding it into the bottom of its housing and pushing it in. Finally, replace as well as tighten the screw that holds a black arm in the housing.
Keep in mind that every blade must use in conjunction with a corresponding housing. If your housings are not damaged or lost, you can reuse them indefinitely. The cover you are using should be compatible with your specific Cricut machine at all times.
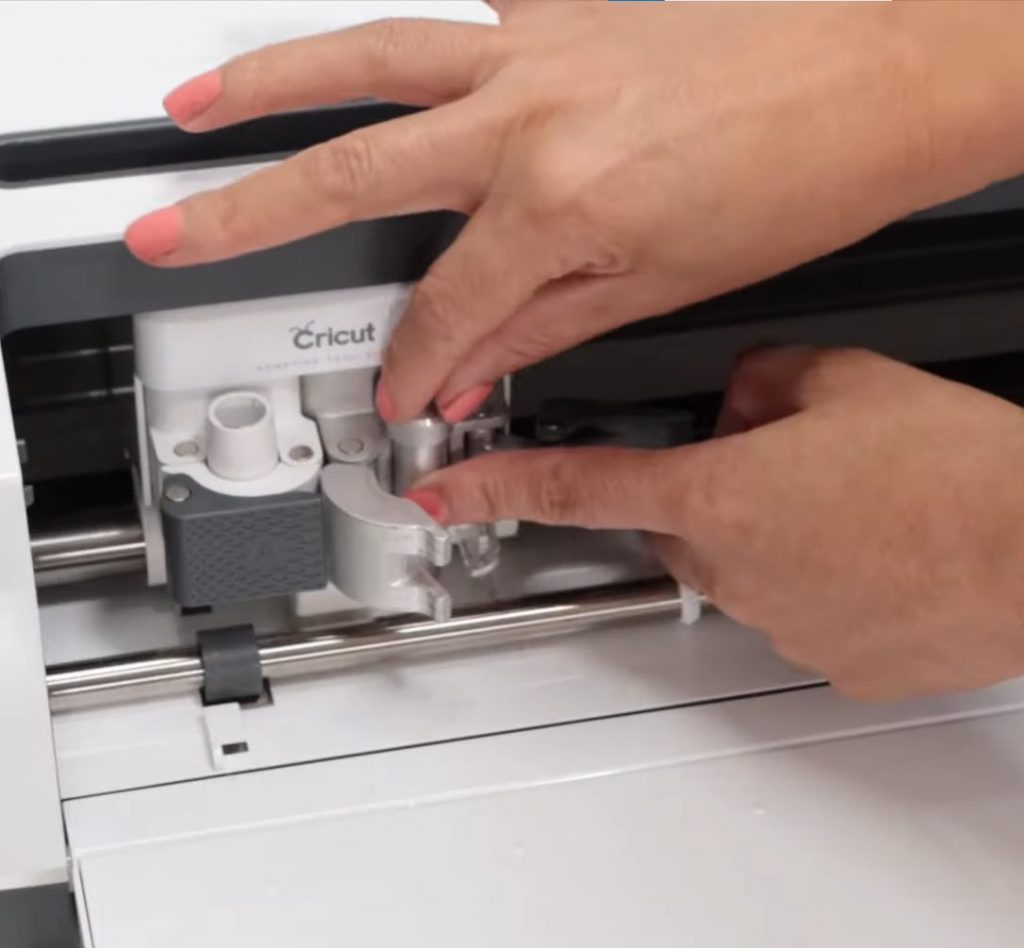
5. Housing Re-Installation
The housing is reinstalling after the replacement of the blade. The housing must be slid into clamp B on the Maker and Explore models. Ensure housing is on top of the clamp B. Alternatively, your cutting machine may struggle. Clamp B can push down when your blade area is in the correct position. You’ll need to exert a small amount of force in this process. For clamp B to align perfectly with clamp A, it must be properly closed.
Read: Best Heat Press Machine Reviews of 2022- Top 8 Heat Transfer Printing Machines
Cricut Blades: What Not to Do (Precautions)
Replacing the blades on your Cricut is a simple process. So here are some factors you should avoid when you’re shopping for a new one.
Avoid Replacing Your Blades Too Soon!
Learn how to sharpen your Cricut blades, so with these clever tricks, you can effortlessly increase a blade’s lifespan.
RELATED: Epson WorkForce WF-7720 Wide-Format All-in-One Printer Reviews
Avoid Exposure of Blades
Please store any blades you don’t intend to use in a covered container. A compartment full of unsecured blades pierced my finger more times than I could count. You can either buy a tool and blade caddy or start making your housing and blade holder.
Make Sure They Don’t Get Jammed up
A blade and housing combination must always use in tandem. Your machine handles precision pairings. Your device, mat, and blade housing may damage if the wrong components are used.
Final Verdict
When it comes to your Cricut machine, your blade is the most important part. Because of this, you should always keep it clean and well-maintained. There is a cost to replacing things. Our advice is simple: Sharpen them before buying a new pair. When the time comes for you to buy a new one, we hope this information and methods will be useful.
Related: Top Trending Vinyl Cutting Machines with Complete Guide

Selena Richard
Selena Richard is a tech blogger and entrepreneur who is passionate about new technologies. She has a keen interest in 3D printing and sublimation printers, which she uses to design crafts and solve problems for small business owners.
Selena provides simple and effective solutions for small business growth. With a team of expert members, she targets the needs of small business owners and takes pride in her work.


