How to Put a Picture on a Shirt – DIY Steps to Print a Photo on a T-Shirt
Ironing a picture on a shirt is not as difficult as you may think. All you need is a few household items and some time to spare. You can iron any image onto your shirt or another article of clothing with and without using heat transfer paper. This post includes tips for both methods, so read on!
The first thing you should do before ironing any picture onto fabric, be it clothing or something else, is test the heat of your iron by running the tip of an old t-shirt over the cloth for about 20 seconds. This will let you know what temperature setting will work best for your project.

Recommended: Best Sublimation Printers For T-Shirts | Top Model Picks & Reviews
How to Iron a Picture on a Shirt – DIY Steps
Now, let me tell you some easy steps to iron a picture on your shirt without damaging or cracking it.
Step 1:
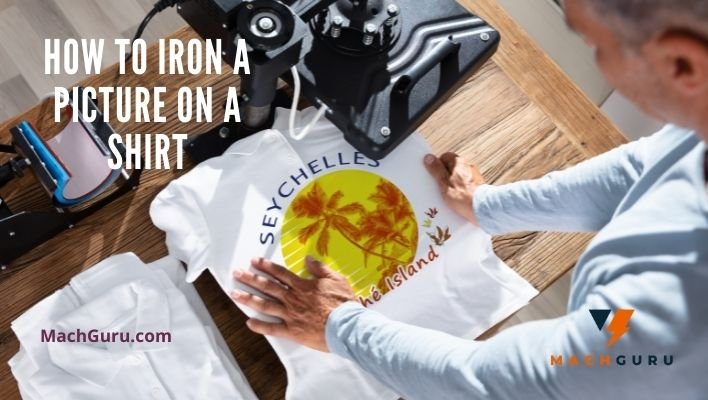
Prepare the shirt and picture. First, iron any wrinkles out of your shirt. Then place your picture face down on the backside of the shirt. The image should be placed in the spot where you want it to appear when worn. In some cases, you can use a mirror image if you don’t want it to appear backward.
Step 2:
Iron over the picture. Now that your shirt and pictures are ready, turn on your iron and set it to either “Cotton” or “Synthetic.” Make sure the setting is normal and never use high heat. As you start ironing, press firmly but be gentle, as you don’t want to damage your picture. Iron over the entire surface of the image. If you are ironing on multiple pictures, make sure that each gets hit with the hot metal.
Step 3:
Press “cotton” or “synthetic.” The label on your shirt will tell you which temperature setting to use. Normal settings should suffice for most shirts, however, synthetic fabrics may require a slightly hotter iron. If your shirt is made of cotton or a cotton blend, then you can press the shirt with normal heat. However, if it’s made from polyester or another synthetic fiber, then turn up the temperature to high and press firmly when moving the cloth over the picture.
Step 4:
Cut away any excess fabric or edges of the picture that has been ironed outside of your design. Make sure to use a pair of sharp scissors, as this part can get tricky. In most cases, you will need to cut off a small section from your shirt to ensure that the entire image has been transferred onto the shirt.
Step 5:
Continue pressing until all of the pictures have been transferred onto your shirt. Continue ironing until you are satisfied that all parts of your image have adhered to the fabric. If there are any white or flimsy edges left over, then use a pair of scissors to carefully snip them off. When done correctly, your picture should adhere to the shirt in a clear and complete fashion.
Step 6:
You’re done! Congratulations! You just learned how to iron a picture onto your shirt. Now you can start planning your next creative hairstyle or character design to transfer to another piece of clothing. Thanks for reading and good luck with all of your future crafts and experiments!

Do I Wash my Shirt Once an Image is Ironed on?
Although your shirt should be washable, we always recommend that you do a small test first on an inconspicuous part of your shirt. If this is done and comes out clean then it is ok to proceed with washing your shirt as usual, but if it does not come out clean try using a sponge or cloth and some water and gently rubbing the area where your iron-on is.
RELATED: Top 8 Latest Sublimation Printers for Beginners 2022 Picks & Reviews
How to Iron on a Printed Picture onto Fabric?
To iron on an already printed picture onto fabric, first, cut out your image along the edges of the paper- don’t forget that there is extra room around your design where you can place another image or text or color in if you’d like. Also, be sure to save the excess paper as you can use this as a stencil or doodle on it to make your shirt even more unique.
Prepare your shirt by making sure the fabric is completely flat and wrinkle-free. Place your printed sheet face down onto the center of your shirt, then place a piece of parchment or wax paper over it and iron with firm pressure. The wax paper is used to protect the fabric from absorbing too much of the adhesive in your inkjet printer or screen print stencil and will keep it from becoming permanently bonded to the shirt and causing damage.
Keep ironing for about 20-30 seconds, removing your hand, and lifting up to take a peek every few seconds to see if the image has transferred. Be sure to flip over and iron both sides and that you cut off any excess fabric sticking out from underneath the paper before removing it as well, as this can also cause damage.
Now let your shirt cool for about thirty seconds or so before carefully peeling up the wax paper to take a look at your masterpiece! You can also test how firmly your ink or paint has bonded by trying to peel the paper up and off- if this doesn’t work you can try running a slightly damp sponge along the back of the paper and letting it sit again, then peeling it up.
Ironing instructions to Iron a Picture on Clothes
- When ironing your shirt, make sure that the design is facing upwards so that it will be flat when you are finished.
- Apply a thin layer of fabric spray onto your shirt. This will give you a smooth surface after ironing and makes it easier for the image to be absorbed into the fabric.
- Iron with caution since this is a piece of clothing so if you accidentally burn yourself, don’t say we didn’t warn you! Since t-shirts are made out of fabrics, the heat level needs to be set to low.
- If you need to iron on cotton shirts, then use a cotton setting. There is also an extra gentle cycle that you can choose if available. You can also try dry cleaning it but make sure that this won’t take away the colors in your image.
- The only difference when using a household iron is that you will need to place some paper down on top of the shirt. This will protect the fabric from any heat damage. You can also use a teflon or silicone ironing sheet .
- There are some special irons that have been made especially for shirts if you don’t want to damage your garments.
- After printing and cutting out the design, place it in position and then begin ironing on the normal setting with medium heat. Make sure that you don’t forget to wear gloves when working with these types of ink since it can be very hot once exposed to air.
- Make sure not to hold away from the fabric when doing this since this can cause the ink to dry faster. For best results, hold it about 3 inches above the shirt.
- Let it cool on its own without removing your hand until is completely set. Make sure not to touch or move the printed area until it is completely dry.
- Avoid ironing over the same spot for too long to prevent dirt build up. If it needs more heat then just add another time or two, but do not hold it there for too long.
- Make sure that the ink is completely dry before washing your shirt. This way you can prevent color smudges if any of the image transfers to the inside of the garment when wet.
RECOMMENDED: Can You Use Sublimation Paper in any Printer?
Precautions to Iron a Picture on a Shirt
- Ironing pictures on shirts are easy but make sure that you will be careful in doing so. Since this is a fabric, you need to handle it with care. Washing it can cause hypoallergenic reactions to your skin which might irritate you.
- When the photo prints out on the shirt, remove the paper after letting it cool. If the image begins to peel after it is ironed, then set it under a heavy book or apply pressure on top of the paper with an object that weighs about ten pounds for at least 24 hours.
- You can also use Glow in The Dark ink when printing your pictures onto t-shirts. This type of ink gets charged by light, so under normal light, it will not be seen. Once it is exposed to darkness, the glow would appear.
Read: Sublimation Troubleshooting: Easy Tips to Handle Sublimation Printing Problems
- Teflon Squeegee: This type of squeegee is made out of teflon which allows you to collect excess ink on the garment without damaging the desired image that has been printed onto the fabric.
- You can use any household iron: You just need to be careful and follow all the instructions that come with your paint or ink.
- Iron at medium setting: Use a low heat level when ironing on fabric. You can start with a low setting then turn it up if necessary. Make sure not to use high heat since this may burn the shirt which means you will end up ruining the entire project.
- Practice on scrap fabric: If you do not have a shirt to use yet, then you can practice on some scrap fabric like old bed sheets. This way you will get used to what needs more heat and pressure before doing it on your actual shirt.
- Iron in circular motion: Always iron in circular motion in case you want to avoid any fabric distortion.
- Let the ink dry thoroughly: If it is too moist, then it can easily tear when washed.
- Let the ink cool before washing: If the image chips off, then the heat probably wasn’t even enough to set the printer properly in place on your shirt. Be sure that is dried completely before washing it.
- Don’t wash with other garments: The color and texture of your shirt is different than most clothes so better to not mix and match. If possible, do the laundry separately or you might end up ruining your entire load.
- If you see your ink starting to peel off, then run the garment through a second dry cycle. Just make sure that the temperature is set to normal.
- Iron from backside of shirts: If you can, avoid ironing on front side since this may cause color distortion. It’s okay if it doesn’t come out perfect as long as no one will see from the front. But who would want a shirt without a good design on the back anyway?
- Don’t stretch the fabric: Ironing on a stretched shirt can cause it to shrink. That is why you must not do this with any garment that has been printed with images.
RELATED: Printable Vinyl – What is it and How Does it work?

Tips to Iron a Picture on a Shirt
- A personalized shirt is always memorable. If you are planning on giving a gift for someone, then the best thing that you can do is to create your own t-shirts. You can iron or glue pictures onto shirts so that whenever they wear it, it will be more special since they have something unique of their own.
- When you are looking for a company to use, there are certain things that you need to keep in mind so that the end result would be very satisfying.
- Find someone who is experienced and can offer great customer service. You don’t want to spend your money for anything since it doesn’t bother them whether they’re going to complete the job or not. If possible, search for a company that has certificates of appreciation and other commendations given to them by satisfied customers.
Recommended: DTG vs. Screen Printing – Which One is Better: Digital or Traditional?
Frequently Asked Questions (FAQs)
Yes, you can definitely print your images onto shirts using screen printing techniques or using an inkjet printer onto iron on paper for your printer.
First, layout your shirt or another fabric item that you want to decorate face up, and place the transfer paper, printed side down on top of it. Next, you will need to remove the layer of backing from the transfer paper to expose the glue. Place a thin cloth or piece of fabric over the transfer image and iron for about 30 seconds at medium heat, then let cool for 60 seconds. After that’s done carefully remove your hand from over the top of the transfer paper and let it cool. Once your iron on has completely cooled, if you are happy with how it looks, you may want to go ahead and heat-seal it by passing an iron over the image for another 20 seconds or so at medium heat.
To turn a picture into an iron-on you need to first print out your image onto transfer paper. Once this is done you just simply place the printed side face down and iron as usual.
There are no special instructions when transferring your image with an iron-on transfer. Just be sure to follow the manufactures directions on the package for best results.

Selena Richard
Selena Richard is a tech blogger and entrepreneur who is passionate about new technologies. She has a keen interest in 3D printing and sublimation printers, which she uses to design crafts and solve problems for small business owners.
Selena provides simple and effective solutions for small business growth. With a team of expert members, she targets the needs of small business owners and takes pride in her work.


